
Side Dishes
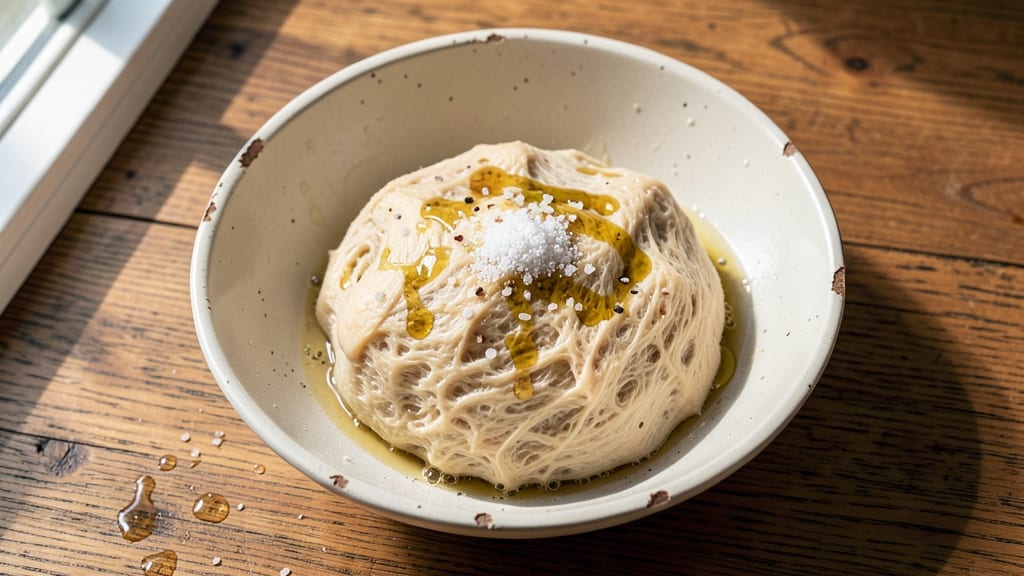
This airy French bread recipe delivers the perfect balance of light, cloud-like crumb and a crispy golden crust that's impossible to resist. The secret lies in precise hydration and controlled fermentation—two techniques that transform simple flour and water into artisanal-quality bread.
I've perfected this method after years of baking, and it consistently produces loaves with an open, airy texture that melts in your mouth.
The process begins with a dough that's hydrated just enough to create that signature open crumb structure, yet firm enough to hold its shape when baked. A slow, cold fermentation (overnight in the fridge) develops deep flavor and strengthens the gluten, ensuring your bread rises beautifully.
The key to that coveted crispy crust is baking at high heat—this creates the perfect contrast between tender interior and crispy exterior.
By the time your bread emerges from the oven, you'll have a loaf that's light as clouds yet sturdy enough to hold up to your favorite toppings—think fresh olive oil, flaky sea salt, and a drizzle of balsamic.
The aroma alone will transform your kitchen into a Parisian bakery. This recipe delivers restaurant-quality results with simple ingredients and a method that's surprisingly foolproof.
Whether you're serving it alongside a charcuterie board or using it to mop up sauces, this French bread becomes the star of any meal. The best part? Once you master this technique, you'll never buy store-bought baguettes again. Ready to bake?"
Ingredients for airy french bread
Nine simple ingredients transform into cloud-like French bread with a perfect crispy crust—no fancy tools needed.
| Ingredient | Amount | Notes |
|---|---|---|
| Bread Flour 🌾 | 3 ½ cups | High-protein for structure |
| Instant Yeast 🍞 | ¼ tsp | Active dry works too |
| Granulated Sugar 🍚 | ½ tsp | Feeds yeast for rise |
| Salt 🧂 | 1 ½ tsp | Diamond Crystal preferred |
| Water 💧 | 1 ½ cups | Room temperature preferred |
| Olive Oil 🫒 | 1 tbsp | Extra-virgin for richness |
| Cornmeal 🌽 | ¼ cup | For dusting parchment |
| Coarse Sea Salt 🧂 | ½ tsp | For crust finishing |
| Ice Water ❄️ | ½ cup | For final shaping |
The flour is everything here. King Arthur or Caputo are my go-tos—they hold up to the slow fermentation like a dream. If you're using all-purpose, add an extra tablespoon. The yeast should be fresh (check the date—it expires fast!). For the water, room temperature is key—too cold and it won't activate properly. I always measure mine by filling a glass with water, then pouring it into the bowl. That way, I know I've got the exact amount without spills. The olive oil might seem like a small amount, but it's what gives that signature softness.
No instant yeast? Active dry works at the same amount—just let it dissolve in the water first. Short on sugar? Honey or maple syrup at half the amount adds flavor too. The coarse sea salt is non-negotiable for that perfect crust—Maldon or Jacobsen are my favorites. If you don't have cornmeal, semolina or rice flour works just as well. The ice water might sound weird, but it's what helps the dough hold its shape during the final proof. Trust me on this—it makes all the difference when shaping those baguettes.
This dough keeps beautifully in the fridge for up to 3 days if you want to prep ahead. Just let it come to room temp before shaping. The shaped loaves can proof at room temp for 1-2 hours or overnight in the fridge for deeper flavor. Baked bread stales fast, so I always freeze half the batch—3 months in a sealed bag. To revive, pop it in a 350°F oven for 5-10 minutes until warm and crispy again.
Why You'll Love This Recipe
- No-Knead Magic: I mix, wait, and bake—no fancy skills needed. The instant yeast does all the heavy lifting while I sip coffee, and that bread flour? It’s that light, pillowy texture you crave without the elbow grease.
- Sweet-Simple Crust: That tiny pinch of sugar caramelizes into a golden, crisp shell while the inside stays soft as a cloud. Honestly, it’s the little details—like the salt balancing the sweetness—that make this bread feel like a hug.
- Bulk-Friendly Bargain: A single batch stretches for sandwiches, toast, or even French toast all week. Between us, this recipe’s cost-per-loaf beats store-bought by a mile, and the leftovers? They disappear faster than I can say "make more."
- Weeknight Hero: Cold slices in lunchboxes? Check. Garlic butter slathered on hot loaves? Done. It’s my go-to when I’m too tired for dinner plans but still want something that feels special—not the prettiest, but the taste makes up for it.
Step-by-step instructions for airy French bread
Here's how to create that perfect cloud-like texture with a crackling crust every time.
Mix the Dough for Maximum Lightness
In a large bowl, whisk together the 3.5 cups bread flour, 0.25 tsp instant yeast, 0.5 tsp granulated sugar, and 1.5 tsp salt. The yeast and sugar will start activating immediately, so work quickly. Add the 1.5 cups water and 1 tbsp olive oil, then stir with a wooden spoon until a shaggy dough forms.
This high-protein flour is key—it develops gluten strands that trap gas for that signature airy texture. Once the dough comes together, turn it out onto a lightly floured surface and knead gently for 3-4 minutes just until smooth. Over-kneading develops too much gluten and makes the bread dense. You're aiming for a soft, slightly tacky dough that springs back when pressed—this ensures that light, pillowy interior.
Let the Dough Rise Until Nearly Doubled
Place the dough in a lightly oiled bowl, cover with a damp towel, and let rise at room temperature for 1-2 hours until it has nearly doubled in size. The dough should feel puffy and look slightly deflated when poked—this indicates proper fermentation. I like to give it a little shake test: if it jiggles gently when the bowl moves, it's ready.
Don't rush this step. The slow rise at room temperature develops the best flavor and texture. If your kitchen is cold, place the bowl in a slightly warm spot (like near the oven with the light on) to help the yeast activate properly. The dough should smell slightly sweet and tangy when ready—this is your cue that the yeast is working its magic.
Shape and Second Rise for Structure
Turn the risen dough onto a lightly floured surface and gently shape it into a 12-inch log about 2 inches thick. The goal is to create surface tension—press down lightly on the top and tuck the sides under to seal. This shaping helps create that classic French bread structure. Place the shaped dough on a parchment-lined baking sheet dusted with 0.25 cup cornmeal for easy release.
Cover loosely with plastic wrap and let rise again for 30-45 minutes until puffy. The dough should expand noticeably but not double completely. This second rise is crucial—it gives the bread its final airy structure before baking. As it rises, you'll see the surface develop small bubbles. These bubbles are your friends—they'll expand into that beautiful open crumb during baking.
Bake for a Crispy Golden Crust
Preheat your oven to 425°F with a baking stone or inverted baking sheet on the middle rack. This creates steam that's essential for that crispy crust. Once preheated, brush the dough with water and sprinkle generously with 0.5 tsp coarse sea salt. Bake for 20-25 minutes until the bread is deep golden brown and sounds hollow when tapped on the bottom.
Here's the secret to that perfect crust: as soon as you put the bread in the oven, pour 0.5 cup ice water into a small bowl on the lower oven rack. The steam created by the evaporating water mimics a professional bakery's steam injection, giving you that crackly, golden crust. The bread is done when it's deep golden brown and has pulled away slightly from the parchment. Let it cool on a wire rack for 15 minutes before slicing—this prevents a gummy interior.
Finish with Crust Enhancement (Optional)
For that extra-crispy crust, place the cooled bread on a wire rack and use a sharp serrated knife to make ¼-inch deep slashes about ½ inch apart along the top. Brush the crust with melted butter and sprinkle with additional coarse sea salt if desired. This final step adds that professional bakery touch while keeping the interior light and airy.
The bread will stay fresh for 2-3 days at room temperature if wrapped in a clean kitchen towel. For extra crispiness, reheat slices in a 375°F oven for 3-5 minutes before serving. Each slice should have that perfect combination of a crispy crust that shatters and a soft, airy interior that melts in your mouth—just like a Parisian boulangerie!
Pro Tips For Making Airy French Bread
- STRETCH THE DOUGH: Let it rest in the fridge overnight—yes, even if you’re eager to bake. Cold slows fermentation, letting gluten relax properly, which gives you that signature airy crumb. I used to rush it, and my loaves always felt dense.
- MEASURE WATER PRECISELY: Use a scale for water (about 65% of flour weight) instead of eyeballing it. Too much makes a gummy mess; too little dries out the crumb. I learned this after tossing three batches where the dough stuck like glue.
- DON’T SKIP THE AUTOLYSIS: Mix flour and water first, then add yeast and salt after 20 minutes. This step develops gluten better than tossing everything together immediately. Sounds weird, but it works—your bread will rise higher and stay light longer.
- STEAM THE OVEN: Place a baking sheet on the bottom rack before preheating. When you bake, pour ½ cup boiling water into it right before sliding in your loaves. The steam mimics a professional bakery’s oven, giving you that crisp crust and airy interior without overbrowning.
Essential equipment for perfect results
Baking Stone Essentials
A baking stone or steel is my non-negotiable tool for this recipe—it mimics a professional bakery's environment by creating even heat distribution and steam. I use a 12-inch by 16-inch Emil baking stone because it fits perfectly in my home oven.
Place it on the middle rack before preheating to ensure it reaches the same temperature as your oven (425°F). The stone's ability to retain heat helps create that signature crispy crust while keeping the interior light and airy. 🔥
Dutch Oven for Crispy Crusts
For a more rustic, bakery-style crust, a Dutch oven is a game-changer. I prefer a Le Creuset 5.5-quart because it distributes heat evenly and creates steam when you add ice water.
Place the dough directly on the oven rack inside the Dutch oven, then pour ½ cup ice water into the bottom. The steam generated during baking gives you that perfect crackly crust without needing a baking stone. This method also works beautifully for smaller loaves.
Digital Thermometer for Precision
Investing in a digital instant-read thermometer like the Thermoworks Thermapen ONE ensures your bread bakes to perfection every time. Use it to check the oven temperature before baking—fluctuations can ruin your crust.
I also use it to verify the bread's internal temperature: it should reach 190-200°F for that ideal crispy-yet-tender balance. A thermometer is especially helpful if your oven runs hot or cold. 🌡️
Scaling Tool for Accuracy
Measuring flour by scooping and leveling leads to inconsistent results. A digital kitchen scale like the OXO Good Grips ensures precision, especially with bread flour. Weigh your 3.5 cups bread flour (about 440 grams) for consistent hydration and rise.
I find that scaling eliminates the guesswork in achieving that signature airy texture. For water, use a measuring cup—liquid measurements are more accurate when poured directly into the bowl.
Sharp Serrated Knife for Scoring
Scoring your bread isn't just decorative—it's essential for controlling where the bread expands during baking. A sharp serrated knife like the Mercer Culinary Genesis makes clean, precise cuts that release steam and create those beautiful crust patterns.
Dip the knife in water before scoring to prevent sticking. I score my loaves about ¼-inch deep, spaced ½ inch apart, just before baking. This step ensures even expansion and that professional bakery look. ✨
Proofing Basket for Perfect Shape
For a more authentic French bread shape, a proofing basket (or banneton) is worth the investment. I use a woven rattan basket lined with a floured towel to shape my dough into a classic baguette form. The basket's texture creates those beautiful dimples on the crust.
If you don't have one, a well-floured kitchen towel rolled into a log works in a pinch. The key is to create tension on the dough's surface for that signature structure. 💫
Nutrition facts
Frequently asked questions
Why does my French bread turn out dense instead of airy?
Over-kneading or under-proofing are the most common culprits. This recipe relies on gentle handling—knead just until smooth (3-4 minutes) and let the dough rise until it's nearly doubled. Cold kitchen? Place the dough bowl near your oven's light bulb to maintain 75-80°F for optimal yeast activity. The ice water trick during shaping also helps maintain structure for that light crumb.
Can I make this bread without a baking stone?
Use an inverted baking sheet on the middle rack to create steam, or try a Dutch oven for even better results. Pour ½ cup ice water into a small bowl on the lower rack when baking—this mimics professional bakery steam. Without a stone, bake for 5-10 extra minutes to ensure a crispy crust while monitoring closely for browning.
How do I get that perfect crispy crust without burning?
The secret is steam and precise timing. Preheat your oven with the baking stone/steel for 45 minutes, then pour ice water into a bowl on the lower rack when loading the bread. Bake at 425°F for 20-25 minutes—rotate the pan halfway if your oven has hot spots. The bread is done when it's deep golden brown and sounds hollow when tapped.
Can I add herbs or seeds to this recipe?
Yes! For herb bread, mix in 1 tbsp chopped rosemary or thyme with the flour. For seeds, use 2 tbsp poppy or sesame seeds in the final dough. Just reduce the water slightly (1.3 cups) since seeds absorb moisture. The airy texture remains, but the flavor profile changes beautifully—try it with olive oil and balsamic for a gourmet touch!
How long can I keep made bread fresh?
Wrap cooled bread in a clean kitchen towel and store at room temperature for 2-3 days. For longer storage, freeze slices in a sealed bag for 3 months. To revive, reheat at 375°F for 3-5 minutes until crispy again. Pro tip: Toast stale slices for 2 minutes to restore freshness instantly!