
Side Dishes
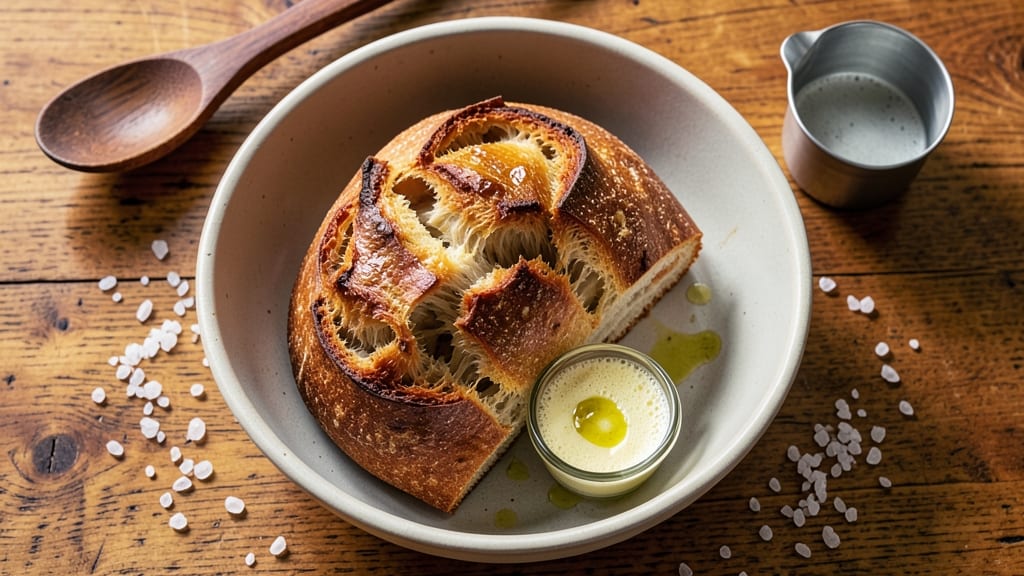
The artisan ciabatta bread recipe delivers that signature open crumb and chewy texture that makes every bite irresistible. This method focuses on traditional techniques—like the pull-and-fold method—to create the perfect airy structure without overworking the dough.
The key lies in precise hydration and proper proofing, which transform simple ingredients into bread with a crispy crust and tender interior.
What sets this ciabatta apart is its no-knead approach, reducing effort while maximizing flavor. The dough develops naturally through folds, creating those signature pockets and a light, airy texture.
High-quality flour and a touch of olive oil ensure a rich, slightly nutty taste that pairs perfectly with soups, salads, or just butter and jam.
By the time you pull it from the oven, you’ll have a loaf with a crusty exterior and a chewy, open crumb that’s impossible to resist.
The process is straightforward—mix, fold, proof, and bake—but the results are anything but basic. This is bread that elevates any meal, whether served fresh or toasted.
Ready to master the art of ciabatta? The instructions will guide you through every step, from mixing to baking, ensuring you achieve that perfect balance of texture and flavor. Let’s get started!
Ingredients for artisan ciabatta bread
High-protein flour, yeast, and olive oil transform simple ingredients into artisan ciabatta with signature open crumb.
| Ingredient | Amount | Notes |
|---|---|---|
| Bread Flour 🌾 | 3 ½ cups | High-protein for structure, 12-14% protein |
| Active Dry Yeast 🍞 | ¼ oz | Freshly opened, not expired |
| Granulated Sugar 🍚 | ½ tsp | Feeds yeast for activation |
| Diamond Crystal Kosher Salt 🧂 | 1 ½ tsp | Fine grain preferred |
| Extra-Virgin Olive Oil 🫒 | ½ cup | Fruity, not refined |
| Warm Water 💧 | 1 ½ cups | 105-110°F for yeast activation |
| Semolina Flour 🌾 | ¼ cup | For dusting and crust |
| Cornmeal 🌽 | ¼ cup | For baking surface |
| Coarse Sea Salt 🧂 | ½ tsp | For final crust sprinkle |
The bread flour is non-negotiable—King Arthur or Caputo deliver the high-protein content (12-14%) essential for that signature chewy texture. If your local store doesn't carry it, Bob's Red Mill high-gluten blend works in a pinch. Yeast quality matters too: Freshly opened packets activate faster, but if using dried, ensure it's stored in the freezer. The extra-virgin olive oil should have a peppery finish—California Olive Ranch or Colavita are reliable choices. For water temperature, 105-110°F is critical; too hot kills the yeast, too cool slows activation.
No semolina? Fine cornmeal works, though it won't crisp as dramatically. Short on coarse sea salt? Diamond Crystal kosher salt crushed between fingers mimics the texture. The pull-and-fold method requires patience—don't rush the 30-minute intervals between folds. For gluten-free adaptations, King Arthur GF blend can substitute, though texture will differ. If proofing fails in cool climates, place the bowl near a warm appliance (not touching) to maintain 78-82°F—ideal for yeast activity.
Freshly baked ciabatta stays crisp for 24 hours at room temperature, wrapped in a clean kitchen towel to prevent sogginess. For longer storage, freeze fully cooled loaves in airtight bags for up to 3 months; thaw overnight at room temperature. The crust develops best when baked in a preheated Dutch oven—if unavailable, a cast-iron skillet works equally well. Reserve the discarded dough scraps for croutons or breadcrumbs.
Why You'll Love This Recipe
- No-Knead Magic: I swear by this trick—just mix, rest, and shape. The yeast does all the hard work while you sip coffee, and that olive oil pull-apart magic? It’s the kind of bread that makes you feel like a baker without the elbow grease. (Between us, my first loaf looked like a lumpy mess, but the flavor won me over.)
- Crusty-Creamy Obsession: That crispy shell with a soft, airy center? It’s the holy grail of bread. The kosher salt and olive oil combo gives it a savory depth that pairs with everything—tomato soup, charcuterie, or just butter and jam. Honestly, I’ve caught myself stealing slices straight from the pan.
- Weeknight Workhorse: This bread is my secret weapon for lazy nights. Toss it in a basket for toast, tear it over salads, or freeze slices for quick toast later. I make a double batch on Sundays—one for the week, one for leftovers that somehow taste better reheated. (Yes, even on a Tuesday night.)
- Budget-Friendly Luxury: Five ingredients, zero shortcuts. Bread flour and olive oil stretch further than you’d think, and a single batch feeds my family for days. The best part? It’s the kind of homemade bread that makes store-bought rolls feel like a splurge. My kids still ask for it even when we’re broke.
Step-by-step instructions for artisan ciabatta bread
Mastering ciabatta means controlling hydration and kneading—here's how to achieve that signature open crumb.
Activate the Yeast and Create the Dough
In a large mixing bowl, combine the 1.5 cups warm water with the 0.5 tsp granulated sugar and 0.25 oz active dry yeast. Let this sit for 5-10 minutes until the mixture becomes foamy and bubbly—this confirms your yeast is active. If it doesn't bubble after 10 minutes, your yeast may be dead and you'll need to start over.
Add the 3.5 cups bread flour and 1.5 tsp diamond crystal kosher salt to the yeast mixture. Using a wooden spoon or dough whisk, stir until a shaggy dough forms. Then add the 0.5 cup extra-virgin olive oil and mix until fully incorporated. The dough will be extremely sticky at this stage—this is normal for ciabatta's high hydration.
Develop the Dough Through Autolyse
Cover the mixing bowl with a damp kitchen towel and let the dough rest for 30 minutes. This autolyse step allows the flour to fully hydrate and develop gluten strands before adding more stress through kneading. During this time, the dough will become more cohesive and easier to handle.
After 30 minutes, wet your hands with water and begin stretching and folding the dough. Work it on a lightly floured surface for 5 minutes, folding the dough over itself four times total. This technique builds structure without overworking the gluten. Return the dough to the bowl, cover, and let it rest for another 30 minutes at room temperature.
Final Kneading and Shaping
After the second rest, perform two more sets of stretch-and-folds, spacing them 30 minutes apart. Each session should take about 5 minutes of active work. The dough will become smoother and more elastic with each fold. For the final stretch-and-fold, add the 0.25 cup semolina flour to your work surface to prevent sticking.
Once the dough is properly developed, shape it into a loose log. Avoid over-handling—ciabatta's signature open crumb comes from minimal shaping. Place the dough on a floured surface, cover, and let it rise at room temperature for 1-2 hours or until it has nearly doubled in size. You'll know it's ready when the dough springs back slowly when poked with a finger.
Shape and Proof for Open Crumb
Lightly dust a baking sheet with 0.25 cup cornmeal and transfer the dough to it. Using a bench scraper, gently shape the dough into an oval loaf by folding the edges toward the center. This creates tension that will open up during baking. Let the dough proof for 30-60 minutes until it has visibly expanded and feels light when tapped.
Preheat your oven to 425°F with a baking stone or inverted baking sheet inside for 45 minutes. Just before baking, use a sharp knife or razor to score the dough in a decorative pattern. Sprinkle the 0.5 tsp coarse sea salt evenly over the top. Bake for 25-30 minutes until the crust is deep golden brown and the internal temperature reaches 205°F.
Cool and Enjoy
Remove the bread from the oven and let it cool on a wire rack for at least 1 hour before slicing. This resting period allows the steam to escape and prevents a gummy crumb. The bread should have a crisp, crackly crust with an open, airy interior when cut.
Slice the ciabatta with a serrated knife and serve warm. The texture should be chewy with an open, lattice-like crumb. Store any leftovers in an airtight container at room temperature for up to 3 days or freeze for longer storage. The flavor improves as it stales slightly, making it perfect for toast or crostini.
Pro Tips For Making Artisan Ciabatta Bread
- STRETCH THE DOUGH: I learned this the hard way—skipping the 10-minute stretch after shaping turns your ciabatta into dense bread instead of airy, chewy clouds. Grab those edges and pull them toward the center like you’re trying to close a stubborn jar lid. The resistance is what creates those signature holes.
- SALT THE WATER: Don’t just sprinkle salt into the flour mix—dissolve the full 2 teaspoons of Diamond Crystal kosher salt in the water first. This guarantees even distribution, so every bite has that balanced, savory punch without any gritty surprises. (Yes, even if you’re impatient like me.)
- AVOID OVERPROOFING: Watch the clock: ciabatta doubles in size but shouldn’t wobble like Jell-O when you jiggle the bowl. Overproofing collapses those air pockets you worked so hard to create. Aim for 1.5–2 hours at room temp—less is more here.
- OIL THE BAKING STONE: Slather that extra-virgin olive oil directly onto a preheated baking stone or tray with your fingers—about 2 tablespoons total. The bread will steam and rise dramatically, giving you that crisp crust and open crumb. (Skip the brush; it misses spots.)
Storing and reheating your leftovers
Room-Temp Storage
Fresh ciabatta stays at its crispy, chewy best for 24 hours at room temperature when wrapped in a clean kitchen towel—this prevents moisture buildup that makes bread soggy. I always store mine in a bamboo steamer basket lined with the towel for extra air circulation.
Avoid plastic bags or containers, which trap steam and ruin the crust. 🌾
Refrigerator Revival
If you need to refrigerate, slice the bread first and store it in an airtight container with a paper towel to absorb excess moisture. Reheat slices in a 350°F oven for 5-7 minutes until warmed through.
For extra crispiness, broil for the last 1-2 minutes—just watch it closely to avoid burning. I find King Arthur's bread bag works perfectly for this.
Freezer Preservation
For long-term storage, freeze fully cooled ciabatta in quart-sized freezer bags with all air squeezed out. Label with the date—it keeps for up to 3 months. When ready to use, thaw overnight at room temperature.
The texture remains chewy but loses some crust crispness. To restore that, pop thawed slices in a toaster oven at 375°F for 3-4 minutes until golden again.
Reviving Stale Bread
If your ciabatta has gone stale, don't toss it! The solution is simple: steam it. Place slices on a baking sheet and cover tightly with aluminum foil.
Heat in a 375°F oven for 8-10 minutes—the trapped steam will restore moisture and crispness. This works wonders for making quick crostini or breadsticks. 💫
Pro Tips for Texture
For the best results, always let bread cool completely before storing. The internal temperature should drop below 90°F to prevent condensation. I also recommend storing individual slices in parchment-lined bags if you plan to freeze them separately—this maintains crispness slice by slice. The key is controlling moisture at every stage!
Nutrition facts
Frequently asked questions
Why does my ciabatta dough feel so sticky?
This is completely normal! Ciabatta's signature texture comes from its high hydration—up to 80% water content. The dough should be tacky but not wet. Use a dough scraper to handle it and avoid adding extra flour, which can toughen the final texture. Wet your hands slightly when shaping to prevent sticking.
Can I make ciabatta without a Dutch oven?
Yes, but you'll need to create steam for that perfect crust. Place a baking stone on the lower oven rack and pour 1 cup hot water into a tray on the bottom rack. Bake at 425°F for 25-30 minutes with the tray of water. A cast-iron skillet works too—just place it in the oven while preheating.
How do I know when the dough is fully proofed?
Look for three signs: the dough should have nearly doubled in size, feel light when tapped, and spring back slowly (not quickly) when poked with a finger. For ciabatta, the surface may develop small bubbles. If it springs back immediately, it needs more time. Overproofing can collapse the structure during baking.
What if my ciabatta turns out dense instead of airy?
This usually means the dough wasn't developed enough during folds or proofed properly. Try these fixes: 1) Perform more stretch-and-folds (up to 4 sets), 2) Ensure proofing happens in a 78-82°F environment, or 3) Shape the dough more gently to create tension. The open crumb comes from proper gluten development and steam during baking.
Can I add herbs or seeds to this recipe?
For extra flavor, mix in 1 tablespoon dried rosemary or 2 tablespoons sesame seeds with the flour before mixing. For a savory twist, try 1/4 cup chopped sun-dried tomatoes or 1/4 cup grated Parmesan. Just be mindful of hydration—herbs may require 1/4 cup extra water to maintain the dough's stickiness.