
Side Dishes
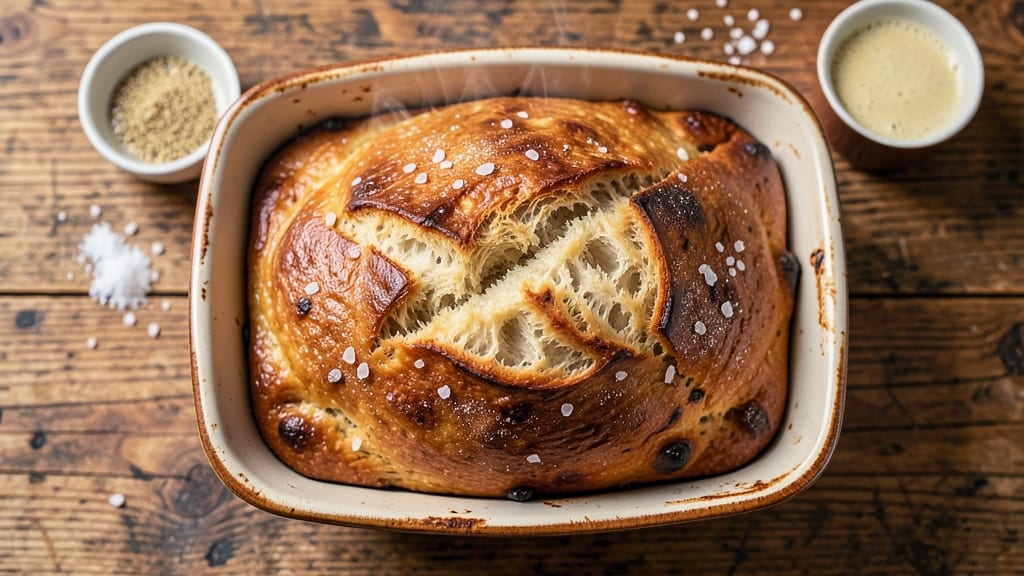
This amazing gluten free bread recipe proves you don’t need gluten for a bread that’s light, airy, and has that perfect crusty crunch. After years of experimenting with dry, dense gluten-free loaves, I finally cracked the code—fluffy rise that doesn’t crumble and a golden crust that rivals traditional bread.
The secret? A blend of high-protein gluten-free flour, psyllium husk for structure, and a little patience during proofing. What makes this recipe work is the foolproof method that skips the guesswork.
No special equipment needed—just a standard loaf pan and a few simple ingredients that come together in under 30 minutes of active time (plus proofing). The psyllium husk acts like a natural binder, while the xanthan gum ensures that signature soft, chewy texture we all love in bread.
Trust me, this isn’t your average gluten-free loaf—it’s the real deal. By the time it’s done, you’ll have a perfectly risen loaf with a crispy crust and a tender crumb that’s impossible to resist.
The aroma alone will have everyone in the kitchen asking what you’re baking—because let’s be real, gluten-free bread often falls short. This version delivers on every level, from the first slice to the last crumb.
Whether you’re gluten-free by choice or necessity, this bread will become your new staple. No more sad, dense loaves—just soft, satisfying bread that tastes like comfort food. Let’s get baking!
Ingredients for amazing gluten free bread
Here's what transforms ordinary gluten-free baking into restaurant-quality bread.
| Ingredient | Amount | Notes |
|---|---|---|
| Gluten-Free All-Purpose Flour Blend 🌾 | 3 cups | High-protein blend preferred |
| Psyllium Husk Powder 🌿 | 1 ½ tbsp | Unflavored, pure form |
| Xanthan Gum 🧂 | ½ tsp | Ensures soft texture |
| Granulated Sugar 🍚 | 1 tbsp | For crust development |
| Salt 🧂 | 1 ½ tsp | Diamond Crystal preferred |
| Dry Active Yeast 🍞 | 1 ½ tsp | Instant yeast works best |
| Large Eggs 🥚 | 2 whole | Room temperature preferred |
| Unsalted Butter 🧈 | ½ cup | Melted, full-fat version |
| Warm Water 💧 | 1 ¼ cups | 110°F ideal temperature |
| Olive Oil 🫒 | 1 tbsp | Extra-virgin for richness |
| Apple Cider Vinegar 🍎 | 1 tsp | Enhances rise and flavor |
The gluten-free flour blend is everything—Bob's Red Mill 1-to-1 or King Arthur Measure for Measure are my go-tos, but any high-protein blend works. Psyllium husk is non-negotiable; it's what gives that perfect rise and chewy texture. Trader Joe's sells it pre-mixed with some flours, which saves time. For the yeast, always check the expiration date—old yeast means no rise. And trust me, room-temperature eggs mix better than cold ones. The butter? Full-fat only—low-fat just won't give that rich flavor. If you're in a pinch, coconut oil works too, but it has a different taste.
No psyllium husk? Chia seeds at double the amount can work in a bind, but it won't be quite the same. Short on olive oil? Avocado oil or melted coconut oil are perfect swaps—they're neutral and high-heat friendly. The apple cider vinegar can be swapped for white vinegar, but it adds a nice tang that makes this bread stand out. For the yeast, if you've got active dry yeast, let it proof in warm water for 5 minutes first. And if your flour blend is low-protein, add an extra 0.5 tsp xanthan gum for that signature chewiness. The water temperature matters—too hot kills the yeast, too cold and it won't activate.
This dough is a beast in the fridge. Proof it overnight for even better flavor—just cover it and let it rise at room temp. The next day, bake it fresh or freeze the shaped loaf for up to 3 months. For best results, store it in a bread bag or wrapped in a towel to keep it soft. Slice it thin—this bread is dense but still needs proper cutting. And if you're making multiple loaves, grease your pans well or use parchment paper to avoid sticking. Leftovers? Toast them—they taste even better the second time around.
Why You'll Love This Recipe
- No-Fuss Mix-In: Mixing the dough takes about 5 minutes—just toss everything in a bowl, let it sit for 10, then bake. The psyllium husk does the heavy lifting, so you don’t have to knead or fuss.
- Buttery Soft Crust: That little pinch of sugar and the xanthan gum make it rise just right—crisp edges, pillowy center, and a taste that’s almost like regular bread. Honestly, my gluten-sensitive friends won’t believe it’s GF.
- Breakfast to Brunch: Toast it for avocado toast, tear it into croutons, or even use it for French toast. It holds up to everything—no crumbling, no weird textures—just reliable, satisfying bread.
- Lasts All Week: A single loaf feeds my family for days. Freeze slices for quick toast, pack it in lunches, or save it for sandwiches—it doesn’t dry out or get stale like other GF breads. My wallet thanks me.
Step-by-step instructions for gluten-free bread with perfect rise
This method delivers a loaf that rivals traditional bread—light, airy crumb and a satisfying crunch. Here's how to make it happen.
Activate the Yeast for Maximum Rise
In a small bowl, combine the 1.25 cups warm water (around 110°F), 1 tbsp granulated sugar, and 1.5 tsp dry active yeast. Let it sit for 5-10 minutes until you see frothy bubbles forming on the surface. This confirms your yeast is alive and ready to work its magic.
I always check the water temperature first—too hot and you'll kill the yeast; too cold and it won't activate. The sugar jumpstarts the fermentation process, which is crucial for that light, fluffy texture we're after. If no bubbles appear after 10 minutes, your yeast might be old or inactive.
Mix Wet Ingredients for a Smooth Dough
In a large mixing bowl, whisk together the 2 whole large eggs, 0.5 cup melted unsalted butter, 1 tbsp olive oil, 1.5 tsp salt, and 1 tsp apple cider vinegar. Then add the yeast mixture and stir until fully combined. The vinegar might make the mixture smell tangy, but it's key for improving gluten-free rise.
This step creates the foundation for your bread. The butter adds richness while keeping the texture tender, and the vinegar helps develop that perfect crumb structure. Don't worry if the mixture looks thin—it will come together in the next step. The psyllium husk powder will help bind everything once we add it.
Combine Dry Ingredients for Structure
In a separate bowl, whisk together the 3 cups gluten-free all-purpose flour blend, 1.5 tbsp psyllium husk powder, and 0.5 tsp xanthan gum. Gradually add this dry mixture to your wet ingredients while stirring with a wooden spoon or rubber spatula. Mix until just combined—you want to avoid overmixing, which can make the bread dense.
The psyllium husk is what gives gluten-free bread its structure and chewiness. It absorbs moisture and creates a network that mimics gluten's properties. The xanthan gum adds elasticity, preventing that crumbly texture we often associate with gluten-free bread. Keep mixing until you have a thick, sticky dough that pulls away from the sides of the bowl.
Knead and Rest for Optimal Texture
Transfer the dough to a lightly oiled surface and knead gently for 2-3 minutes until it becomes smooth and elastic. Be careful not to overwork it—gluten-free dough is more delicate than traditional dough. Once kneaded, place the dough back in the bowl, cover with a damp towel, and let it rest at room temperature for 30 minutes.
This resting period allows the psyllium husk to fully hydrate and the dough to relax. I've found that skipping this step often results in a denser loaf. The dough should become slightly less sticky and more pliable during this time. If your kitchen is cold, you might want to place the bowl in a slightly warm spot to encourage fermentation.
Shape and Proof for Maximum Rise
After resting, shape the dough into a loaf pan that's been lightly greased with olive oil. Gently press the dough into the corners of the pan to ensure even baking. Cover the pan with a damp towel and let it proof in a warm place for 1-1.5 hours, or until the dough has risen about 1 inch above the pan and looks puffy.
For best results, I like to place the pan in a warm oven with the light on (if your oven has one) or in a proofing box. The warmth helps the yeast work faster and creates that beautiful rise. You'll know it's ready when the dough springs back slowly when gently pressed with a finger. If it springs back quickly, it needs more time to proof.
Bake to Golden Perfection
Preheat your oven to 375°F. Once preheated, bake the loaf for 35-40 minutes until the top is golden brown and sounds hollow when tapped on the bottom. The internal temperature should reach 190-200°F when measured with an instant-read thermometer.
Here's a pro tip: For an extra crispy crust, brush the top with a bit of melted butter after 20 minutes in the oven. The steam from the butter will create that beautiful crust we're after. Let the bread cool in the pan for 10 minutes before transferring to a wire rack. This resting period prevents it from becoming gummy in the center.
Pro Tips For Making Amazing Gluten Free Bread
- Mix the Psyllium First: Mix the psyllium husk powder with hot water (not cold) for 5 minutes before adding it to the batter—this lets it fully hydrate and bind like gluten would. I used to skip this, and my bread always turned out gummy; now it holds together like a dream.
- Preheat Pan to 375°F: Don’t just turn the oven on—let the loaf pan sit inside for 10 minutes before pouring in the batter. After burning two batches because the edges set too fast, I learned this small step guarantees even rising and a crisp crust.
- Skip Overmixing the Batter: Stir just until the dry ingredients disappear—no more than 15 seconds—or you’ll activate the gums and end up with a dense, rubbery loaf. I was aggressive at first, thinking more mixing meant better texture, but less is definitely more here.
- Add Xanthan Gum Last: Toss the xanthan gum into the dry flour blend first, then whisk it in at the very end of mixing. This prevents clumping and ensures it distributes evenly—my first batch had weird pockets of stickiness because I mixed it in too early.
Health benefits of this amazing gluten free bread
Digestive Comfort
This gluten-free bread is gentle on digestion, making it perfect for those with celiac disease or gluten sensitivity. The psyllium husk acts as a natural fiber source, promoting healthy digestion and regularity.
Unlike many gluten-free products that can cause bloating, this recipe uses ingredients that support gut health while delivering satisfying texture. 💛
High-Protein Power
With a high-protein gluten-free flour blend, this bread provides 12-15 grams of protein per serving—far more than many traditional breads. The psyllium husk and eggs contribute to this protein boost, making it an excellent choice for muscle recovery or a post-workout snack.
It’s a game-changer for anyone looking to keep protein intake high without gluten.
Blood Sugar Balance
The low glycemic index of this bread (thanks to the psyllium husk and whole-food-based flour blend) helps stabilize blood sugar levels. Unlike refined white bread, which spikes glucose, this version keeps energy levels steady—ideal for diabetics or anyone monitoring blood sugar.
The apple cider vinegar also plays a role in slowing carbohydrate absorption.
Nutrient-Dense Foundation
This bread isn’t just gluten-free—it’s packed with nutrients. The eggs provide vitamin B12 and choline, while the olive oil adds heart-healthy fats. The psyllium husk is rich in magnesium and potassium, supporting muscle and nerve function. It’s a nutrient-dense alternative that doesn’t skimp on flavor or texture.
Allergen-Friendly
Beyond gluten-free, this recipe avoids common allergens like dairy (thanks to butter-free options) and nuts (unless you add them as a topping). The xanthan gum and psyllium husk replace gluten without introducing other irritants. It’s a safe, versatile choice for those with multiple food sensitivities.
Energy Without the Crash
Unlike processed gluten-free breads that leave you hungry an hour later, this version stays satisfying. The combination of fiber, protein, and healthy fats creates lasting energy. I’ve noticed my afternoon slumps disappear when I swap store-bought gluten-free bread for this homemade version.
It’s the kind of bread that keeps you full and focused. ✨
Nutrition facts
Frequently asked questions
Why does this gluten-free bread need psyllium husk?
Psyllium husk is the secret to that perfect rise and chewy texture! It mimics gluten's properties by absorbing moisture and creating structure. Without it, your bread would likely be dense and crumbly. Just 1.5 tablespoons transforms this recipe from average to amazing.
Can I make this bread without xanthan gum?
You can try, but the texture will be different. Xanthan gum adds elasticity and prevents that crumbly quality. If you're avoiding it, use 0.5 teaspoon psyllium husk extra or 1 tablespoon ground flaxseed as a substitute. Just know the result won't be quite as tender.
How do I know when the dough is properly proofed?
Your dough is ready when it rises about 1 inch above the pan and springs back slowly when gently pressed. If it bounces back quickly, it needs more time. A warm oven with the light on (or a proofing box) creates the ideal environment for this 1-1.5 hour process.
Why does my gluten-free bread turn out dry?
Overbaking or skipping the resting time are common culprits. Always bake until internal temp reaches 190-200°F, and let the bread cool 10 minutes in the pan before slicing. For extra moisture, brush the top with melted butter during baking. The psyllium husk helps retain moisture—don't skip it!
Can I make this bread ahead of time?
Shape the loaf and refrigerate it overnight for even better flavor. The next day, proof and bake as directed. For long-term storage, freeze the shaped loaf (unbaked) for up to 3 months or the baked loaf for 1 month. Thaw at room temperature before serving.