
Desserts
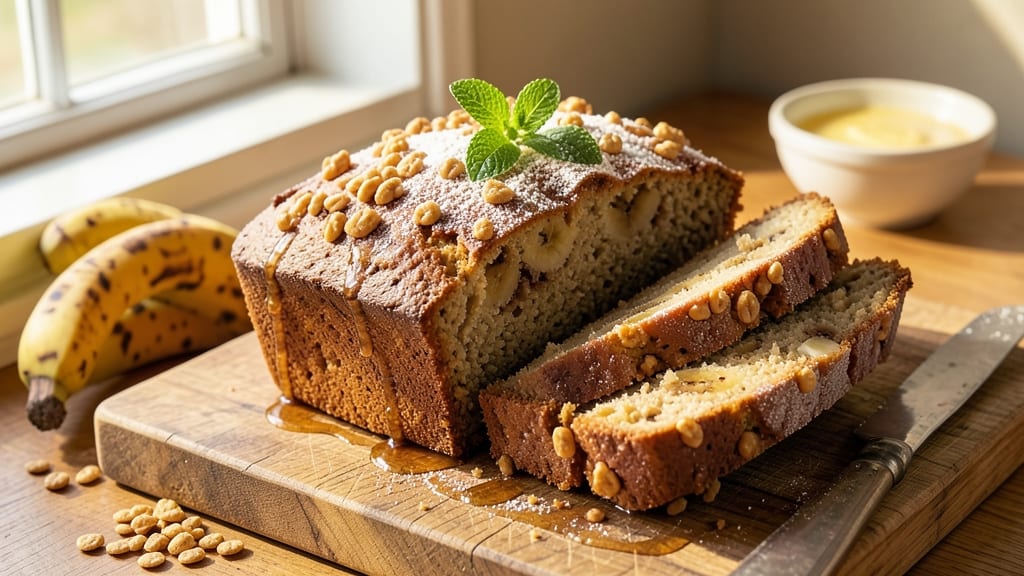
All-Bran banana bread transforms overripe bananas into a dense, moist loaf with a secret fiber boost from whole grains—no one will guess it's secretly healthy. 💛 The key lies in the All-Bran, which absorbs moisture differently than flour, creating that signature tender crumb while keeping slices satisfyingly substantial. I've baked this version for years, and it's the only banana bread that stays moist for days without drying out.
This recipe balances sweetness and nutrition perfectly, using ripe bananas for natural sweetness while the All-Bran adds hearty texture and fiber. The baking soda ensures a gentle rise, while cinnamon and walnuts (if using) add warm, comforting flavors.
Unlike traditional banana bread, this version holds its shape beautifully while delivering that classic banana aroma that fills every kitchen.
What makes this stand out is the moisture that lasts—no one will believe how tender each slice remains even after sitting for days. The All-Bran creates a slightly denser crumb than traditional recipes, but that's exactly what makes it heartier and more satisfying.
It's the ideal dessert for breakfast, snacking, or gifting—every bite delivers that perfect balance of sweetness and wholesome goodness.
For extra indulgence, fold in chocolate chips or pecans, but the basic version already delivers rich banana flavor with a nutritious twist. Ready in about 60 minutes, this loaf is perfect for using up ripe bananas while creating something everyone will love. Let's get baking!
Ingredients for all bran banana bread
Pantry staples plus a few ripe bananas—this recipe turns simple ingredients into a moist, fiber-rich loaf.
| Ingredient | Amount | Notes |
|---|---|---|
| All-Bran Cereal 🌾 | 1 cup | Unprocessed, original flavor |
| All-Purpose Flour 🌾 | 1 ½ cups | Lightly sifted for even texture |
| Ripe Bananas 🍌 | 3 medium | Mashed, about 1.5 cups |
| Large Eggs 🥚 | 2 whole | Room temperature for even mixing |
| Brown Sugar 🍚 | 1 cup | Packed, for caramel notes |
| Granulated Sugar 🍚 | ½ cup | For balanced sweetness |
| Vegetable Oil 🫒 | ½ cup | Light, neutral flavor |
| Milk 🥛 | ½ cup | Whole milk for richness |
| Baking Soda 🧂 | 1 tsp | Freshly measured |
| Ground Cinnamon 🌿 | 1 ½ tsp | True cinnamon, not cassia |
| Salt 🧂 | ½ tsp | Fine sea salt |
| Chopped Walnuts 🌰 | ½ cup | Optional, toasted for crunch |
The All-Bran is the secret weapon here—grab the original flavor from the cereal aisle, not the pre-sweetened kind. I always buy mine from Kroger's bulk section since it's cheaper and stays fresh longer. For the bananas, look for ones with brown spots—the riper, the better. They'll be sweeter and mash up perfectly. If you're using store-bought All-Bran, check the label for added sugars—some brands sneak them in. The walnuts? Trader Joe's has the best price, but any store-brand works fine. Toast them first—they add so much flavor.
No All-Bran? Substitute with 1 cup whole wheat flour plus 1/2 cup oat bran—it won't be identical, but close. Out of walnuts? Pecans or chopped almonds work just as well. The milk can be swapped for almond milk (though the texture might be slightly drier). For the sugars, maple syrup at 3/4 cup works in a pinch—just reduce the flour by 1/4 cup. The cinnamon is crucial—Penzeys or any good-quality brand makes a difference. If you only have cassia, use half the amount. And don't skip the baking soda—it's what makes this bread rise properly.
This keeps beautifully—3 days at room temperature wrapped in foil, or 5 days in the fridge. For longer storage, slice and freeze—3 months is no problem. I always bake two loaves at once so I have one ready to grab. The second loaf? Perfect for freezing or gifting. Pro tip: Brush the warm loaf with a little extra oil while it's still in the pan—it adds that restaurant-quality shine. And if you're worried about the All-Bran making it too dense, trust me—it's what keeps it moist for days.
Why You'll Love This Recipe
- No Mixer Needed: I swear by this recipe when my hands are full—just mash those bananas, stir in the All-Bran, and fold in the dry ingredients. The texture’s dense but tender, and the cereal adds a satisfying crunch without extra effort.
- Banana-Brown Sugar Magic: That caramelized brown sugar swirled into the batter? It’s where the flavor really lives. The All-Bran gives it a toasty depth, while the ripe bananas keep it moist—every bite tastes like a hug from your grandma’s kitchen.
- Breakfast or Dessert: Honestly, I make this for both. Toast a slice with peanut butter for a grab-and-go breakfast, or serve it warm with a drizzle of honey for a lazy Sunday treat. It’s the kind of bread that works any time of day.
- Budget-Friendly Staples: All-Bran and bananas are pantry basics that won’t break the bank, and this loaf lasts forever—perfect for meal prep or stashing in the freezer. My wallet (and my taste buds) thank me every time.
Step-by-step instructions for All Bran banana bread
Here's how to make this ultra-moist, fiber-packed banana bread that stays fresh for days.
👨🍳 Step 1: Prep the All-Bran Cereal for Texture
Preheat your oven to 350°F and lightly grease a 9x5-inch loaf pan or line it with parchment paper. In a small bowl, toss the 1 cup All-Bran Cereal with 1 tablespoon of the brown sugar (reserve the rest for later). Spread this mixture evenly on a baking sheet and bake for 8-10 minutes until lightly toasted and fragrant.
This toasting step is key—it prevents the cereal from absorbing too much moisture and turning mushy. When it's done, the cereal should smell nutty and look just slightly darker around the edges. Let it cool completely before adding to the batter, or it'll make your bread dense instead of light and crumbly.
🍌 Step 2: Mix Wet Ingredients for Maximum Moisture
In a large mixing bowl, mash the 3 medium ripe bananas until smooth—no lumps! I like to use a potato masher for this because it keeps some texture while still breaking everything down. Add the ½ cup vegetable oil, ½ cup milk, ½ cup granulated sugar, and ½ cup brown sugar to the bananas and whisk until fully combined.
The bananas should be completely smooth at this point—this ensures your bread stays moist. If you're using very ripe bananas (the spotty kind), they'll be naturally sweeter, so you might want to reduce the granulated sugar slightly. The mixture should be thick but pourable, like a loose batter.
👨🍳 Step 3: Combine Dry Ingredients and Fold Gently
In a separate bowl, whisk together the 1.5 cups all-purpose flour, 1.5 teaspoons ground cinnamon, ½ teaspoon salt, and 1 teaspoon baking soda. Sift the flour mixture into the wet ingredients and gently fold together using a spatula—don't overmix! Add the 2 whole large eggs one at a time, mixing just until incorporated.
Here's where it gets tricky: you want to mix just until everything comes together. Overmixing develops gluten, which makes your bread tough. The batter should be thick and slightly sticky, with a few flour streaks still visible. Fold in the cooled All-Bran cereal and ½ cup chopped walnuts (if using) until evenly distributed.
🔥 Step 4: Bake Until Golden and Springy
Pour the batter into your prepared loaf pan and smooth the top with a spatula. Bake in the preheated 350°F oven for 50-60 minutes, or until a toothpick inserted in the center comes out clean with just a few moist crumbs clinging to it. The bread is done when the top is golden brown and springs back slightly when touched.
I know it seems like a long time, but patience pays off here—the All-Bran cereal needs that extra time to fully cook through without turning gummy. If the top browns too quickly, tent the pan with foil after 30 minutes to prevent over-browning while the center finishes cooking.
⏰ Step 5: Cool and Slice for Perfect Texture
Remove the bread from the oven and let it cool in the pan for 10 minutes, then transfer to a wire rack to cool completely. This resting period is crucial—it lets the moisture redistribute so every slice comes out moist, not dry. I like to let mine cool for at least 30 minutes before slicing, but if you can wait 1 hour, it'll be even better.
When you're ready to slice, use a sharp serrated knife and cut through the center to create two equal loaves. The bread should have a tender crumb with pockets of chewy All-Bran cereal throughout. Store leftovers wrapped tightly at room temperature for up to 3 days, or freeze for up to 3 months for maximum freshness.
Pro Tips For Making All Bran Banana Bread
- Pulse the Bran: Mixing All-Bran cereal dry into the batter? Stop. Add it in two pulses—first half after the wet ingredients, then fold in the rest just before baking. This keeps the texture light instead of dense. I learned this the hard way after a loaf turned into a brick.
- Mash Bananas Like You Mean It: Overripe bananas with tiny spots? Good. Underripe bananas with no give? Bad. Press them through a mesh strainer or mash them thoroughly with a fork—no chunks, no excuses. The smoother the puree, the more even the texture. (Yes, even if you’re impatient like me.)
- Don’t Overmix the Batter: Once you add the flour, stir just until combined—maybe 10-12 strokes max. Overmixing turns All-Bran banana bread into a chewy, gummy mess. The bran absorbs liquid fast, so resist the urge to "fix" it by adding more milk. Trust the recipe.
- Bake Until the Toothpick Comes Out Clean: The bran makes this bread tricky—it can look done before it is. Wait until a toothpick inserted in the center comes out with no moist batter clinging to it, even if the top feels slightly underdone. Cover with foil the last 10 minutes if the edges brown too fast. (Your future self will thank you.)
Storing and reheating this dish
Room Temperature Storage
Wrap your cooled loaf tightly in plastic wrap or place it in an airtight container to lock in moisture. I always store mine on the counter for up to 3 days—the All-Bran keeps it fresh longer than traditional banana bread.
For extra protection, brush the top with a thin layer of vegetable oil before wrapping to maintain that restaurant-fresh shine. 💛
Fridge Preservation
If you're planning to keep it longer than 3 days, pop the wrapped loaf in the fridge where it’ll stay fresh for up to 5 days. The cold slows moisture loss, but I recommend slicing it before freezing for best results.
Always let slices come to room temperature before serving—they’ll taste even better when not chilled.
Freezing for Later
For maximum shelf life, slice the bread and wrap each piece individually in plastic wrap, then place them in a freezer bag with all the air squeezed out. This method keeps it fresh for up to 3 months without drying out.
When ready to eat, thaw slices at room temperature for 30 minutes or warm them in the oven at 300°F for 5-7 minutes for that fresh-baked taste.
Reheating Secrets
To revive stale slices, wrap them in a damp paper towel and microwave on medium power for 20-30 seconds. For a crispier texture, toast slices in a toaster or under the broiler for 2-3 minutes—the All-Bran adds a nice crunch when reheated this way.
I also love warming slices in a 350°F oven for 8-10 minutes with a pat of butter for ultimate comfort.
Portion Control Tips
Slice the loaf into 1-inch thick pieces for even heating and serving. Store individual slices in quart-sized freezer bags if you prefer grab-and-go portions. Label bags with the date to track freshness—this bread freezes beautifully without losing moisture or texture.
For gift-giving, wrap slices in parchment paper and tie with twine for a professional touch.
Reviving Dried Bread
If your bread dries out, don’t toss it! Spritz slices with water or milk and warm in the oven at 300°F for 8-10 minutes to restore moisture. The All-Bran absorbs liquids differently than flour, so this method works better than microwaving for texture recovery.
For extra flavor, add a drizzle of honey or peanut butter after reheating. 💡
Nutrition facts
Frequently asked questions
Why does this recipe use All-Bran instead of regular flour?
The All-Bran adds a fiber boost and creates a denser, moist crumb that stays fresh longer than traditional banana bread. It also gives each bite a pleasant chewy texture from the toasted cereal pieces. The bran absorbs moisture differently, keeping slices tender even after days of storage.
Can I make this gluten-free?
Yes, but with adjustments! Replace the 1.5 cups all-purpose flour with a 1:1 gluten-free flour blend (like Bob's Red Mill) and add 1/2 teaspoon xanthan gum to improve texture. The All-Bran will still work, but expect a slightly denser result. For best moisture, reduce the milk to 1/4 cup and add 1 extra tablespoon oil.
What if my bananas aren't ripe enough?
Use 2 extra ripe bananas (4 total) and reduce the sugar by 1 tablespoon to compensate. Overripe bananas (with brown spots) work best—they're sweeter and mash more smoothly. If you must use slightly green bananas, bake them with an apple core for 15 minutes first to soften them.
How do I know when the bread is fully baked?
Insert a toothpick into the center—it should come out with just a few moist crumbs (not wet batter). The bread should also spring back slightly when gently pressed. Since All-Bran takes longer to cook through, don't rely solely on time—check internal doneness at 45 minutes and bake until golden.
Can I add chocolate chips or nuts?
Fold in 1/2 cup chocolate chips or 1/2 cup chopped walnuts (or both) with the All-Bran. For extra flavor, toast the nuts first. Just don't overmix after adding them, or the bread may become dense. The recipe already balances sweetness and texture perfectly without extra mix-ins.