
Main Courses
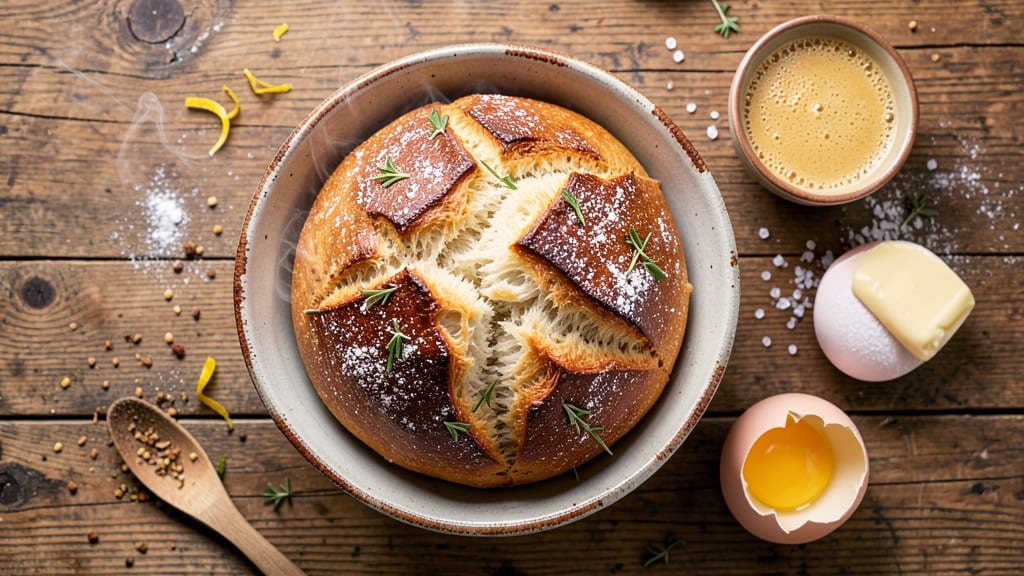
The air fryer yeast bread recipe transforms your kitchen into a bakery with just 30 minutes of hands-on time and a crispy crust that rivals any artisan loaf.
This method skips the long oven wait, delivering perfectly proofed, golden-brown bread with a light, airy interior—all while cutting energy use by half. The secret lies in precise yeast activation and air fryer temperature control, ensuring every slice has that bakery-fresh texture without the fuss.
What sets this recipe apart is the balance of technique and simplicity: warm water activates the yeast instantly, while a light dusting of flour prevents sticking during the air fryer's rapid heat cycle.
Unlike traditional baking, you won’t need a Dutch oven or worry about oven space—just shape your dough, let it proof briefly, and let the air fryer work its magic. The result? Bread with a crunchy exterior and tender crumb that stays fresh for days when stored properly.
This recipe delivers restaurant-quality bread that’s perfect for breakfast toast, sandwiches, or dinner rolls. The air fryer’s even heat distribution means no more burnt crusts or undercooked centers—just consistent, foolproof results every time.
Pair it with homemade jam, butter, or even a savory garlic dip for a meal that feels special without the effort.
Whether you're feeding a family or craving fresh bread without the oven commitment, this method proves you can achieve bakery perfection at home. The best part? No special equipment beyond your air fryer and a little patience for proofing. Let’s get started on bread that’ll have everyone asking for seconds.
Ingredients for air fryer bread recipe with yeast
Nine simple ingredients transform your air fryer into a bakery—crispy crust, light crumb, zero oven fuss.
| Ingredient | Amount | Notes |
|---|---|---|
| Active Dry Yeast 🍞 | 2 ¼ tsp | Ensure yeast is fresh and active |
| All-Purpose Flour 🌾 | 3 cups | Plus 1 tbsp for dusting |
| Warm Water 💧 | 1 ¼ cups | 110-115°F for yeast activation |
| Granulated Sugar 🍚 | 1 tbsp | Feeds yeast for activation |
| Unsalted Butter 🧈 | ¼ cup | Softened, not melted |
| Large Egg 🥚 | 1 whole | Room temperature preferred |
| Salt 🧂 | 1 tsp | Fine sea salt preferred |
| Olive Oil 🫒 | 1 tbsp | For dough flexibility |
| Cornmeal 🌽 | ½ cup | For air fryer basket lining |
The yeast is non-negotiable—Bob’s Red Mill or Saf-Instant are reliable brands, but any active dry yeast works if fresh. Warm water is critical: too hot kills yeast, too cold slows activation. 110-115°F is ideal—test by touching the water; it should feel warm but not hot to your wrist. For flour, King Arthur or Gold Medal are consistent choices, but any all-purpose will do. The butter should be softened to room temperature—not melted—to prevent dense dough. If your egg is cold, let it sit out for 10 minutes before using.
No yeast? Sourdough starter can replace it, but the ratio changes—use 1/4 cup starter per 3 cups flour. Short on butter? Coconut oil works in a pinch, though it adds a subtle flavor. The olive oil can be swapped for avocado oil if preferred. For a lighter loaf, some bakers add 1 tsp baking powder, but omit it for a more rustic texture. If your air fryer basket isn’t nonstick, line it with parchment paper instead of cornmeal—just make sure to cut slits for steam to escape.
Active yeast expires fast—store it in the freezer for up to 6 months to preserve freshness. Dough can proof at room temperature for 1 hour or in the fridge overnight for deeper flavor. For storage, wrap cooled bread in a clean kitchen towel and keep at room temperature for 2-3 days. To revive stale bread, sprinkle with water and toast in the air fryer at 350°F for 3-5 minutes. Freeze slices for up to 3 months by wrapping individually in plastic.
Why You'll Love This Recipe
- No-Knead Magic: I swear by this—just mix the flour, yeast, sugar, and warm water, let it rest while I make dinner. No rolling, no waiting hours, just a dough that comes together faster than my coffee brews.
- Buttery Crust, Soft Core: That crispy exterior with a pillowy inside? It’s all in the butter brushed on after air frying. Honestly, the first time I tried it, I nearly ate the whole loaf straight from the basket.
- Breakfast to Dinner Fix: Use it for toast in the morning, garlic bread at dinner, or even French toast later—same dough, endless uses. My kids fight over the leftovers, and I don’t even have to bake two batches.
- Budget-Friendly Staple: Five ingredients, one pan, zero waste. I make two loaves for the price of a single bakery baguette, and they stay fresh for days. (Yes, even on a Tuesday night.)
Step-by-step instructions for air fryer yeast bread
This method delivers a golden crust and tender crumb without needing an oven.
Activate the Yeast for Maximum Rise
In a small bowl, combine the 1.25 cups warm water (tested at 110-115°F—it should feel warm to touch but not hot) with the 1 tablespoon granulated sugar and 2.25 teaspoons active dry yeast. Let this sit for 5-10 minutes until it becomes frothy and bubbly. This confirms your yeast is active and ready to work.
If the mixture doesn't bubble after 10 minutes, your yeast may be dead—start fresh with new yeast. I always check this step carefully because inactive yeast leads to dense, flat bread. If it passes, proceed with confidence knowing your dough will rise properly.
Mix the Dough and Knead Until Elastic
In a large mixing bowl, combine the 3 cups all-purpose flour and 1 teaspoon salt. Make a well in the center and pour in the yeast mixture along with the 1 whole large egg, 0.25 cup softened unsalted butter, and 1 tablespoon olive oil. Using a wooden spoon or dough whisk, stir until a shaggy dough forms.
Turn the dough onto a lightly floured surface and knead for 8-10 minutes until smooth and elastic. You'll know it's ready when it springs back slowly when poked. If the dough feels sticky, add 1 tablespoon flour at a time until it's workable. This kneading develops gluten, which gives your bread its structure and chewiness.
Let the Dough Rise Until Doubled in Size
Lightly grease a large bowl with olive oil, place the dough inside, and cover with a damp kitchen towel. Let it rise in a warm spot (like near the oven with the light on) for 1-1.5 hours or until doubled in size. The dough should feel puffy and light when pressed gently.
I always check for doneness by pressing two fingers into the dough—if it springs back slowly, it's ready. If your kitchen is cold, extend the rising time to 2 hours. Patience here ensures a light, airy texture. Once fully risen, punch down the dough to release air bubbles before shaping.
Shape and Prepare for Air Frying
Divide the dough into 4 equal portions (about 8 ounces each) and shape each into a smooth ball. Place them on a floured surface and cover with a towel while you prepare the air fryer. Line the air fryer basket with 0.5 cup cornmeal to prevent sticking.
Arrange the dough balls in the basket, spacing them about 1 inch apart. Cover lightly with a clean kitchen towel and let them rise for another 20-30 minutes until slightly puffy. This second rise ensures they expand properly in the air fryer. The cornmeal creates a crispy, golden crust that's characteristic of air fryer bread.
Air Fry to Crispy Perfection
Preheat the air fryer to 350°F for 3 minutes. Then, cook the bread at 350°F for 8-10 minutes, flipping each piece halfway through, until the crust is deep golden brown and the internal temperature reaches 190°F. The bread should sound hollow when tapped on the bottom.
Watch closely in the last 2 minutes—the air fryer can go from perfectly cooked to overdone quickly. If the crust starts to darken too much, reduce the temperature to 325°F for the final 1-2 minutes. Let the bread cool on a wire rack for 5 minutes before serving to allow the steam to escape and the crumb to set properly.
Pro Tips For Making Air Fryer Bread Recipe With Yeast
- Measure Yeast Precisely: Use a kitchen scale for the yeast—1 gram of active dry yeast is about 2 teaspoons, but eyeballing it leads to underproofing or overproofing. I learned this the hard way when my first batch collapsed because I scooped too much.
- Don’t Skip the First Rise: Let the dough double in a warm spot before shaping—this isn’t optional. Air fryers can’t fix underproofed dough, and you’ll end up with dense, chewy bread instead of light, airy slices.
- Preheat the Air Fryer: Run it at 350°F (175°C) for 3 minutes before adding the bread—this ensures even browning and a crisp crust. Skipping this step means your bread will steam instead of crisp up.
- Brush with Melted Butter: After air frying, brush the warm bread with melted butter while it’s still in the basket—this adds richness and keeps it soft longer. (Yes, even if you’re impatient like me, wait 2 minutes before doing this.)
Storing and reheating this recipe
Room-Temp Storage
Keep your air fryer bread fresh for 2-3 days by wrapping it in a clean kitchen towel. Store it in a paper bag or airtight container at room temperature, but avoid plastic—it traps moisture and makes the bread soggy.
I always place the bread on a wire rack first to cool completely before storing, which prevents condensation buildup. 🌟
Fridge Revival
If your bread loses its crispness, revive it by sprinkling 1 teaspoon water over each slice and reheating in the air fryer at 350°F for 3-5 minutes. For extra crunch, brush slices with melted butter before reheating.
I’ve found this method works best for bread that’s been refrigerated for 3-4 days—any longer and the texture becomes too dense to revive.
Freezer Magic
Freeze individual slices wrapped in plastic wrap for up to 3 months—this preserves freshness perfectly. To reheat, place frozen slices directly in the air fryer at 375°F for 4-5 minutes until golden and crisp.
For whole loaves, slice after thawing to maintain texture. I always label freezer bags with dates to track freshness—this bread stays just as good as day one when frozen properly. ❄️
Microwave Hack
When you’re in a rush, the microwave works in a pinch: wrap bread in a damp paper towel and heat on 50% power for 20-30 seconds. This prevents drying but won’t restore crispiness.
For best results, combine with the air fryer method above—microwave first to warm through, then finish in the air fryer for that bakery-style crust. It’s not perfect, but it’s a lifesaver for busy mornings.
Oven Alternative
If your air fryer is occupied, transfer bread to a baking sheet and warm in a 350°F oven for 5-7 minutes. Line the sheet with parchment paper and brush the bread with olive oil before baking for extra crispiness.
I’ve used this method when cooking multiple dishes simultaneously—it’s not as quick as the air fryer, but it delivers reliable results without extra equipment.
Nutrition facts
Frequently asked questions
Can I make this bread without a kitchen scale?
The recipe uses standard measurements: 3 cups flour, 1.25 cups water, and 4 equal dough portions (about 8 ounces each). For the yeast activation test, use a thermometer or touch test (110-115°F water should feel warm but not hot). The dough's readiness is tested by the "finger poke" method—if it springs back slowly, it's perfect!
Why did my bread turn out dense instead of light and airy?
Dense bread usually means the yeast didn't activate properly or the dough didn't rise enough. Double-check your yeast—it should bubble within 5-10 minutes in warm water. Also, ensure your kitchen is warm enough (try a turned-off oven with light on) and let the dough rise until it's doubled in size. If your kitchen is cold, extend rising time to 2 hours. Over-kneading can also make bread dense, so aim for 8-10 minutes of kneading.
Can I make this recipe with whole wheat flour?
Yes, but expect a denser texture and slightly shorter rise time. Replace 1 cup of all-purpose flour with whole wheat flour and add 2 extra tablespoons water to compensate for the extra moisture. Whole wheat flour absorbs liquid differently, so monitor the dough's consistency closely. For best results, reduce the yeast by 0.25 tsp since whole wheat can slow fermentation.
How do I adjust the recipe for a larger air fryer?
For bigger batches, increase dough portions to 6-8 ounces each and space them 1.5 inches apart in the basket. Reduce air fryer temperature to 340°F and extend cooking time by 2-3 minutes, flipping once. If your air fryer has multiple levels, use the top rack for even browning. Remember, air fryers circulate heat differently than ovens—watch closely to avoid over-browning.
Can I add herbs or seeds to this bread?
Add 1-2 tablespoons of seeds (like sesame or poppy) or 1 teaspoon dried herbs (rosemary or thyme) directly to the flour before mixing. For fresh herbs, finely chop 1 tablespoon and mix into the dough after kneading. Just be mindful of moisture—if using wet ingredients like chopped herbs, reduce water by 1 tablespoon. The air fryer's high heat will enhance the flavors beautifully!